
Straylight Run
Software, Technology, PHP
 0
0
According to these Munin memory graphs, the large orange area is the OS buffer cache – a buffer the OS uses to cache plain ol’ file data on disk. The graph below shows one of our web servers after we upgraded its memory.

It makes sense that most of the memory not used by apps would be used by the OS to improve disk access. So seeing the memory graphs filled with orange is generally a good thing. After a few days, I watched the orange area grow and thought, “Great! LInux is putting all that extra memory to use.” I thought in my head that maybe it was caching images and CSS files to serve to Apache. But was that true?
Looking At A Different Server
Here is a memory graph from one of our database servers after the RAM upgrade.

Again, I first thought that the OS was caching all that juicy database data from disk. The problem is that we don’t have 12GB of data, and that step pattern growth was suspiciously consistent.
Looking again at the web server graph, I saw giant downward spikes of blue color, where the buffer cache was emptied. (The blue is unused memory.) These occurred every day at 4 am, and on Sundays there’s a huge one. What happens every day at 4 am? The logs are rotated. And on Sundays, the granddaddy log of them all – the Apache log – is rotated.
The Problem
It was starting to make sense. Log files seem to take up most of the OS buffer cache on the web servers. Not optimal, I’m sure. And when they’re rotated, the data in the cache is invalidated and thus freed.
Here is a memory graph for one of our other database servers.

That step pattern growth is missing! In fact, most of RAM is unused. What is the difference between the first database server and this one? The first has the `mysqldump` backup. It occurs every night at 2:30 am, right when those step changes occur on its memory usage graph.
It was clear to me that most of the OS buffer cache was wasted on logs and backups and such. There had to be a way to tell the OS not to cache a file.
The Solution
Google gave me this page: Improving Linux performance by preserving Buffer Cache State. I copied the little C program into a file and ran it on all the `mysqldump` backups. Here is the what happened to the memory usage.

Quite a bit of buffer cache was freed. On that night’s backup, I logged the buffer cache size before the backup and after.
% cat 2008.08.21.02.30.log
Starting at Thu Aug 21 02:30:03 EDT 2008
=========================================
Cached:        4490232 kB
Cached:        5350908 kB
=========================================
Ending at Thu Aug 21 02:30:55 EDT 2008
Just under a gigabyte increase in buffer cache size. What was the size of the new backup file?
% ll 2008.08.21.02.30.sql
-rw-r--r-- 1 root root 879727872 Aug 21 02:30 2008.08.21.02.30.sql
About 900MB.
Did It Work?
I used the C program on that page to ensure no database backups were cached by the OS. I did the same on the web servers in the logrotate config files. A couple days later, I checked the memory graph on the database server that performed the backup. Notice how the buffer cache did not fill up. It looked like the program worked, and the OS was free to cache more important things.

At work, we had set up some wildcard virtual hosts in Apache config, and that got us by for quite some time. But the time came when we needed finer-grained control of where to send incoming requests for different domains. I needed to store my virtual hosts in a Mysql database, mapping domains to project directories.
I’ll spare you the problems I ran into and overcame, and just list the steps to get this done. These instructions are based on a 64-bit, RHEL 5 server running the pre-packaged Apache server. So if you follow these instructions on a different setup, of course, filenames, directories, versions, etc. may differ.
Install mod_vhost_dbd
Download dbd-modules from Google Code. This is a great piece of code in the form of an Apache module that uses mod_dbd and a DBD Mysql (or other database) driver to fetch the DocumentRoot for a given domain from a database.
% wget http://dbd-modules.googlecode.com/files/dbd-modules-1.0.5.zip
Unzip the archive in a directory. As indicated on the website, build and install the module.
% apxs -c mod_vhost_dbd.c
% apxs -i mod_vhost_dbd.la
This places mod_vhost_dbd.so in /usr/lib64/httpd/modules. Enable both this module and mod_dbd by adding two lines to httpd.conf, or equivalently creating a new include file in /etc/httpd/conf.d containing these lines.
LoadModule dbd_module modules/mod_dbd.so
LoadModule vhost_dbd_module modules/mod_vhost_dbd.so
In true unit fashion, now might be a good time to restart Apache, just so you can be sure everything is working up to this point.
% service httpd restart
Install Mysql DBD Driver to APR
Unfortunately, on my system, the Mysql DBD driver was nowhere to be found. I had to rebuild Apache Portable Runtime (APR) utils with the Mysql driver enabled.
Download apr and apr-util from Apache. Note these are not the latest versions, but the versions that matched the packages in worked for RHEL 5.
% wget http://archive.apache.org/dist/apr-1.2.8.tar.bz2
% wget http://archive.apache.org/dist/apr-util-1.2.8.tar.bz2
Unpack and untar these archives in the same parent directory.
Build and install APR. Now, I do not think this is absolutely necessary, but it seems like a good idea to keep the versions in sync.
% ./configure --prefix=/usr
% make
% make install
Build and install apr-util. Due to licensing issues, apr-util does not actually contain the Mysql DBD driver until apr-util-1.2.12. Prior to that version, it must be downloaded separately, and the configure script rebuilt.
% wget http://apache.webthing.com/svn/apache/apr/apr_dbd_mysql.c
% ./buildconf --with-apr=../apr-1.2.7
Now for the three commands every Linux admin loves.
% ./configure --prefix=/usr --with-apr=/usr --libdir=/usr/lib64 --with-expat=builtin --with-ldap-include=/usr/include --with-ldap-lib=/usr/lib64 --with-ldap=ldap --with-mysql
% make
% make install
The first time I tried this, Apache could not find any LDAP-related modules. Adding those configure switches seemed to do the trick. Restart Apache.
% service httpd restart
Apache should now be able to query a Mysql database to get the DocumentRoot for a domain. My VirtualHost block looked something like this.
    ServerName *.example.com
    DocumentRoot "/path/to/default/document/root"

    DBDriver mysql
    DBDParams host=localhost,user=root,pass=secret,dbname=vhosts

    DBDocRoot "SELECT path FROM vhosts WHERE host = %s"  HOSTNAME
For more details and instructions on mod_vhost_dbd configuration directives, read the project wiki.
To test things on our RHEL 5 production servers, I fire up CentOS 5 in VMWare. While we build PHP 5.2 manually in production, I try to avoid doing so just for testing. Unfortunately, CentOS 5 is packaged with PHP 5.1 by default which becomes a big difference between my testing and production environments. Fortunately, there is a CentOS yum repository out there with PHP 5.2. I thought I’d document this here for anyone else with the same problem.
The solution I found starts with this thread about upgrading PHP on the CentOS forums. To summarize, run these commands:
% cd /etc/yum.repos.d
% wget http://dev.cnetos.org/centos/5/CentOS-Testing.repo
Then, edit the .repo file and set the "enabled" value to "1".
% yum list available php
Available Packages
php.i386                                 5.2.6-2.el5s2          c5-testing
At work, every project has an .htaccess file containing at the least some mod_rewrite rules. This way, all I need to do to run a project is check it out of version control. I don’t need to modify my local Apache configuration.
But turning this option on and allowing .htaccess files may be a performance hit. More specifically, enabling the AllowOverride option in Apache is a performance hit. The Apache docs sums up the problem best:
“Wherever in your URL-space you allow overrides (typically
.htaccessfiles) Apache will attempt to open.htaccessfor each filename component. For example,DocumentRoot /www/htdocsAllowOverride all and a request is made for the URI
/index.html. Then Apache will attempt to open/.htaccess,/www/.htaccess, and/www/htdocs/.htaccess.”
So I disabled all .htaccess files in production, and inserted each file’s individual mod_rewrite rules into the main Apache config file. After a quick Apache Bench run, one project looked around 3% faster. Note that there are a few other useful optimizations on that page.
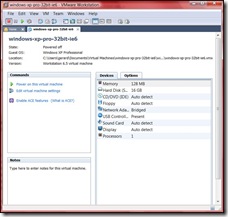
Though I have heard good things about Parallels and VirtualBox, I have always been a user of VMware. In particular, VMware Workstation. Workstation is great for firing up multiple Linux instances and testing out load-balancing or proxying scenarios. I haven’t really figured out any use for Windows VM’s other than testing IE6.
While there are a few Virtual PC hard disk images (.vhd) for Windows XP around, VMware cannot directly import .vhd files. It needs the actual Virtual PC virtual machine file (.vmc). After again losing my Windows XP virtual machine that I use for IE6 testing, I thought I’d document the process of running Windows XP in VMware so I don’t have to figure it out again the next time it happens.
Note: though these instructions are for VMware Workstation, some of this may apply to the free VMware Player.
- Download the IE6 Virtual PC Virtual Hard Disk (.vhd) image from Microsoft.
- Download and install Virtual PC from Microsoft, if you don’t have it already.
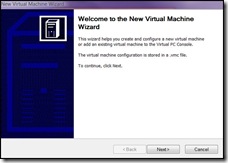
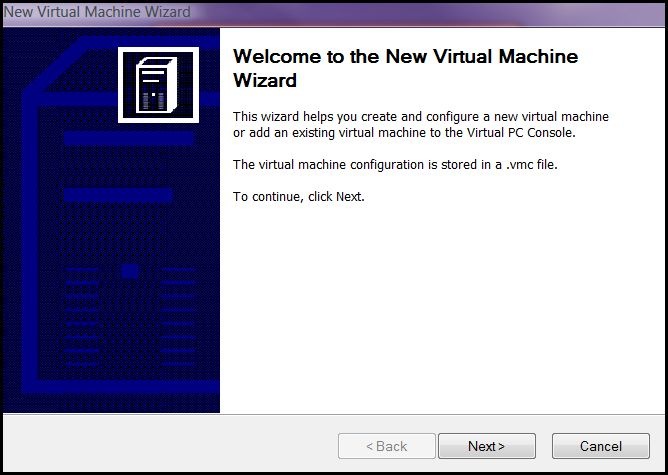
- Start Virtual PC. If you have no virtual machines, you will get the New Virtual Machine Wizard. Click Next.
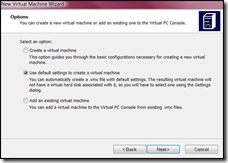
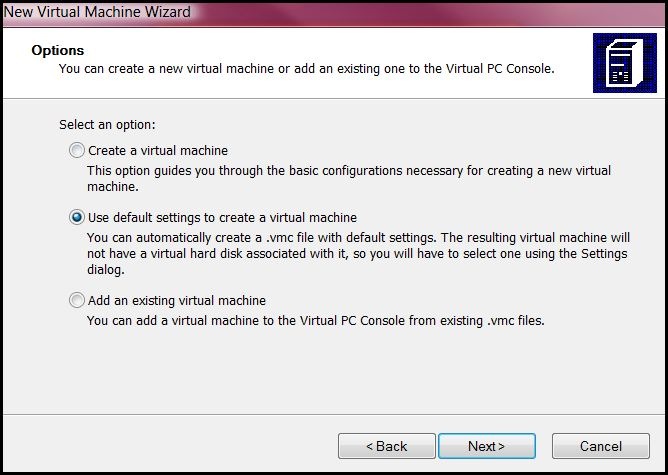
- Select “Use default settings to create a new virtual machine”. Click Next.
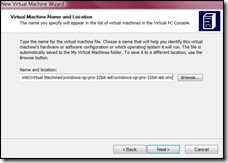
- Pick a location to save your Virtual PC virtual machine. This should be the location you will create the VMware virtual machine. I keep all my VM’s in the same directory with meaningful names.
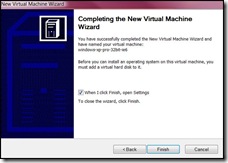
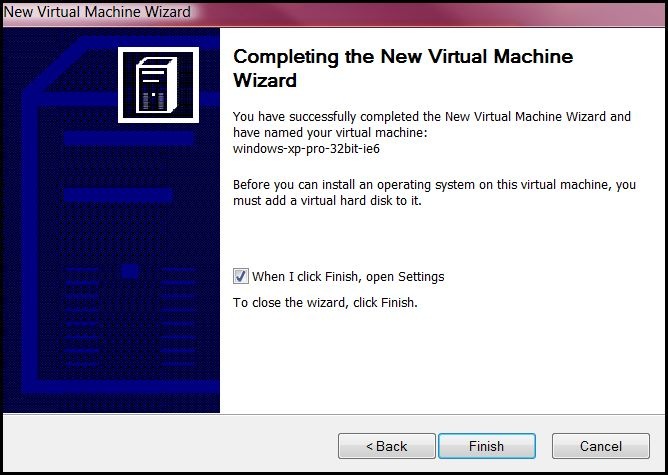
- Click Finish to create the new virtual machine.
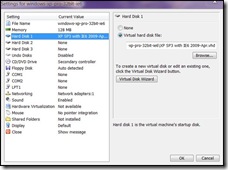
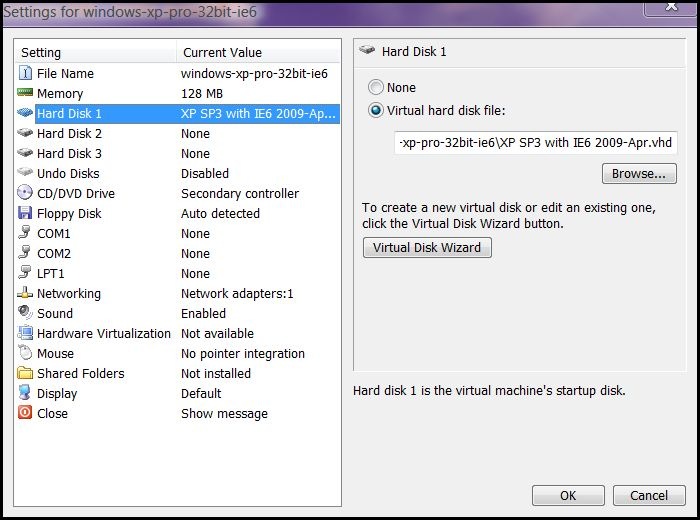
- If you selected “When I click Finish, open Settings,” in the previous step, you will see the settings dialog. If you did not, select the new VM and click Settings. Select “Virtual hard disk file:” and find the .vhd file you downloaded in step 1. After finding it, click OK.
- You should see your VM in the Virtual PC Console.
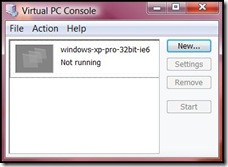
- Select your VM and click Start. Your Windows XP virtual machine should boot in its own window.

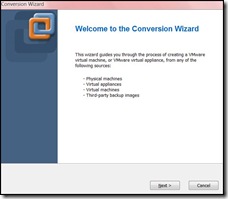
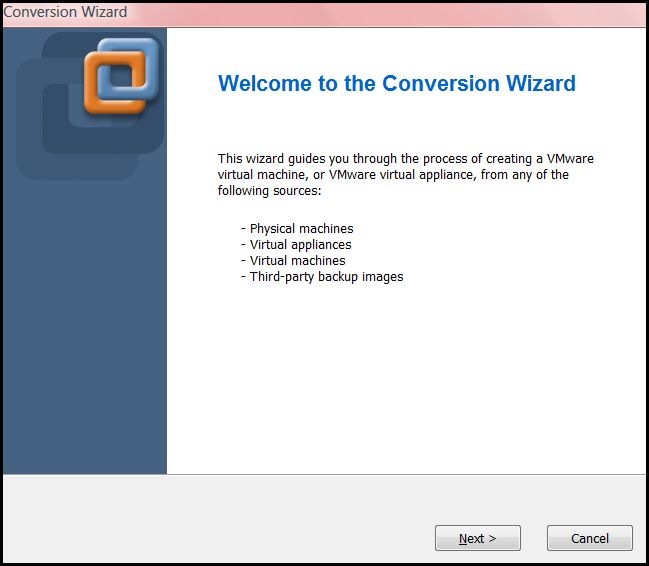
- Shut down the virtual machine using the Start button. Then exit out of Virtual PC. Start VMware Workstation. Once it’s started, select “Import or Export…” from the “File” menu. You should see the Conversion Wizard. Click Next.
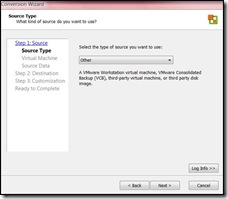
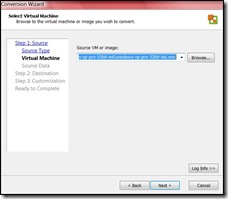
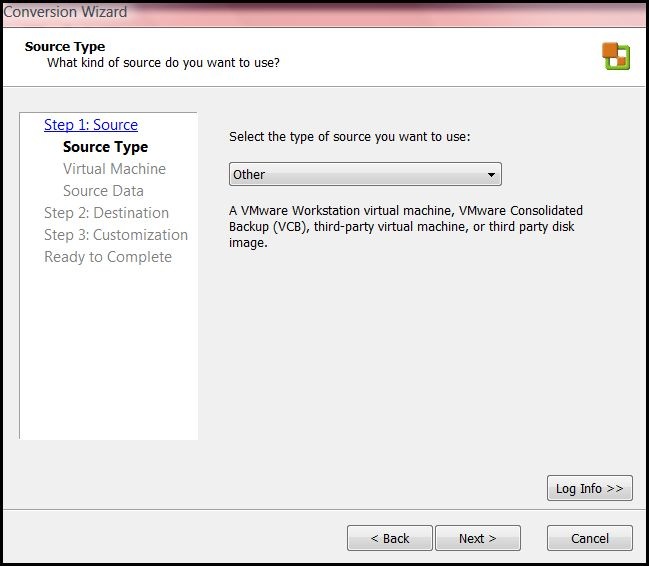
- You are at Step 1 of the conversion. Click Next to select a Source Type. Under “Select the type of source you want to use:”, select Other. Click Next.
- Under “Source VM or image:”, find the Virtual PC (.vmc) file you created earlier. Click Next.
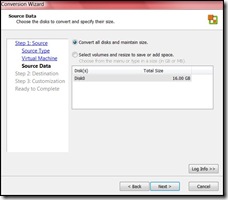
- Select “Convert all disks and maintain size.” Click Next.
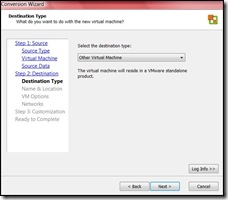
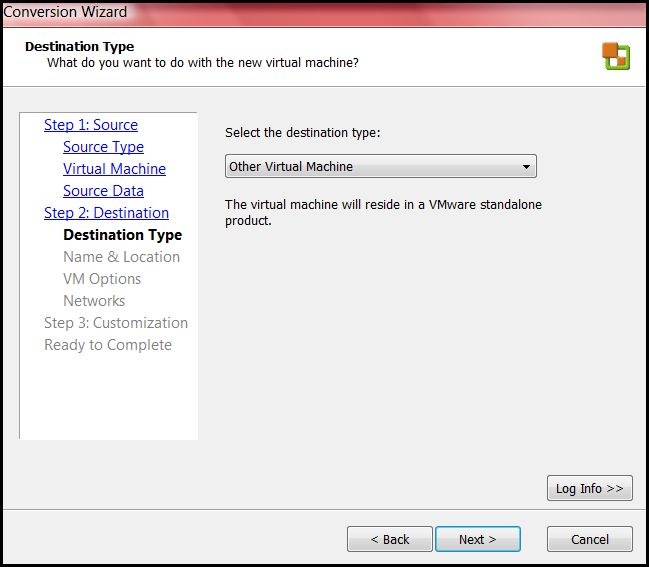
- You are at Step 2 of the conversion. Click Next to select a destination type. Under “Select the destination type,” select “Other Virtual Machine.” Click Next.
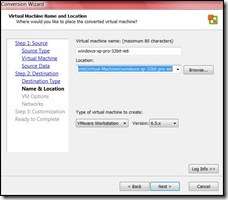
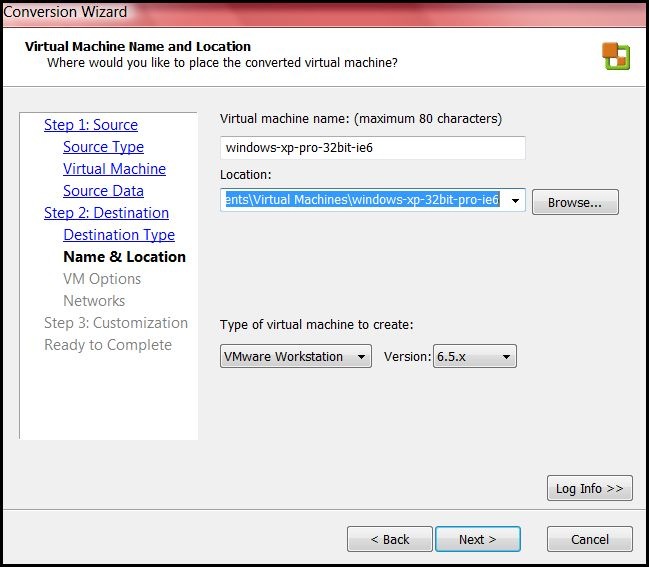
- Under “Virtual machine name,” fill in a meaningful name. Under “Location:”, find the place you want to store your virtual machine. Click Next.
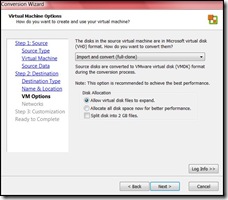
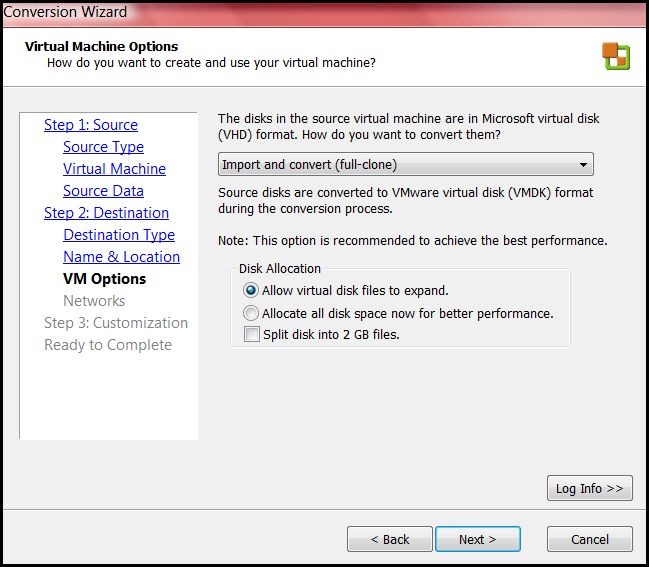
- The wizard tells you that the source files are in Microsoft virtual disk (.vhd) format. Under “How do you want to convert them?”, select “Import and convert (full-clone).” Under “Disk Allocation,” Select “Allow virtual disk files to expand.” Click Next.
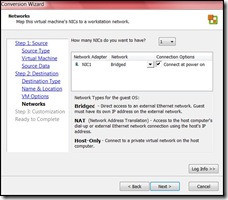
- The next step allows you to configure your VM networking. You should probably stick to the default of 1 NIC, bridged, that connects at power on. Click Next.
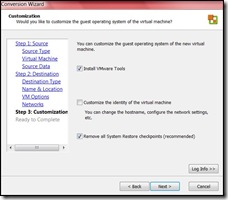
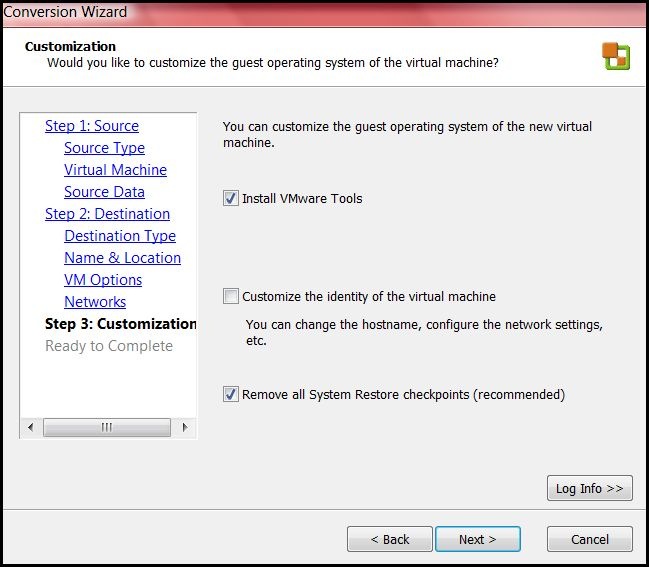
- Step 3 allows for some VMware customisation. You definitely want to install the VMware Tools. Click Next.
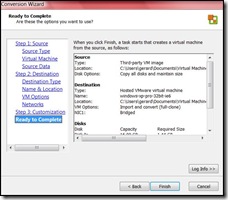
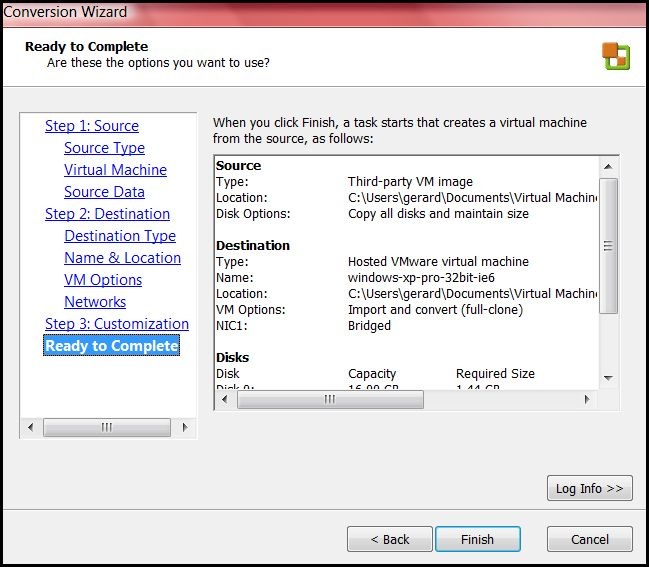
- You’re Virtual PC image is ready to be converted to VMware. Click Finish to begin the conversion!
- Get up from your desk and take a walk around. Go get a cup of coffee.
- After the conversion is completed, you should see your new Windows XP virtual machine in VMware Workstation.
- Click on “Power on this virtual machine” and your Windows XP VM should boot inside of VMware Workstation. You can uninstall Virtual PC at this point, if you want (which is likely, since you’re running VMware).


 Back to top
About Me
 Gerard Sychay is a software developer in beautiful Cincinnati, OH, and partner at Differential. Nowadays, I do most of my blogging at the Differential blog.


